Our wonderful Lead Animator,
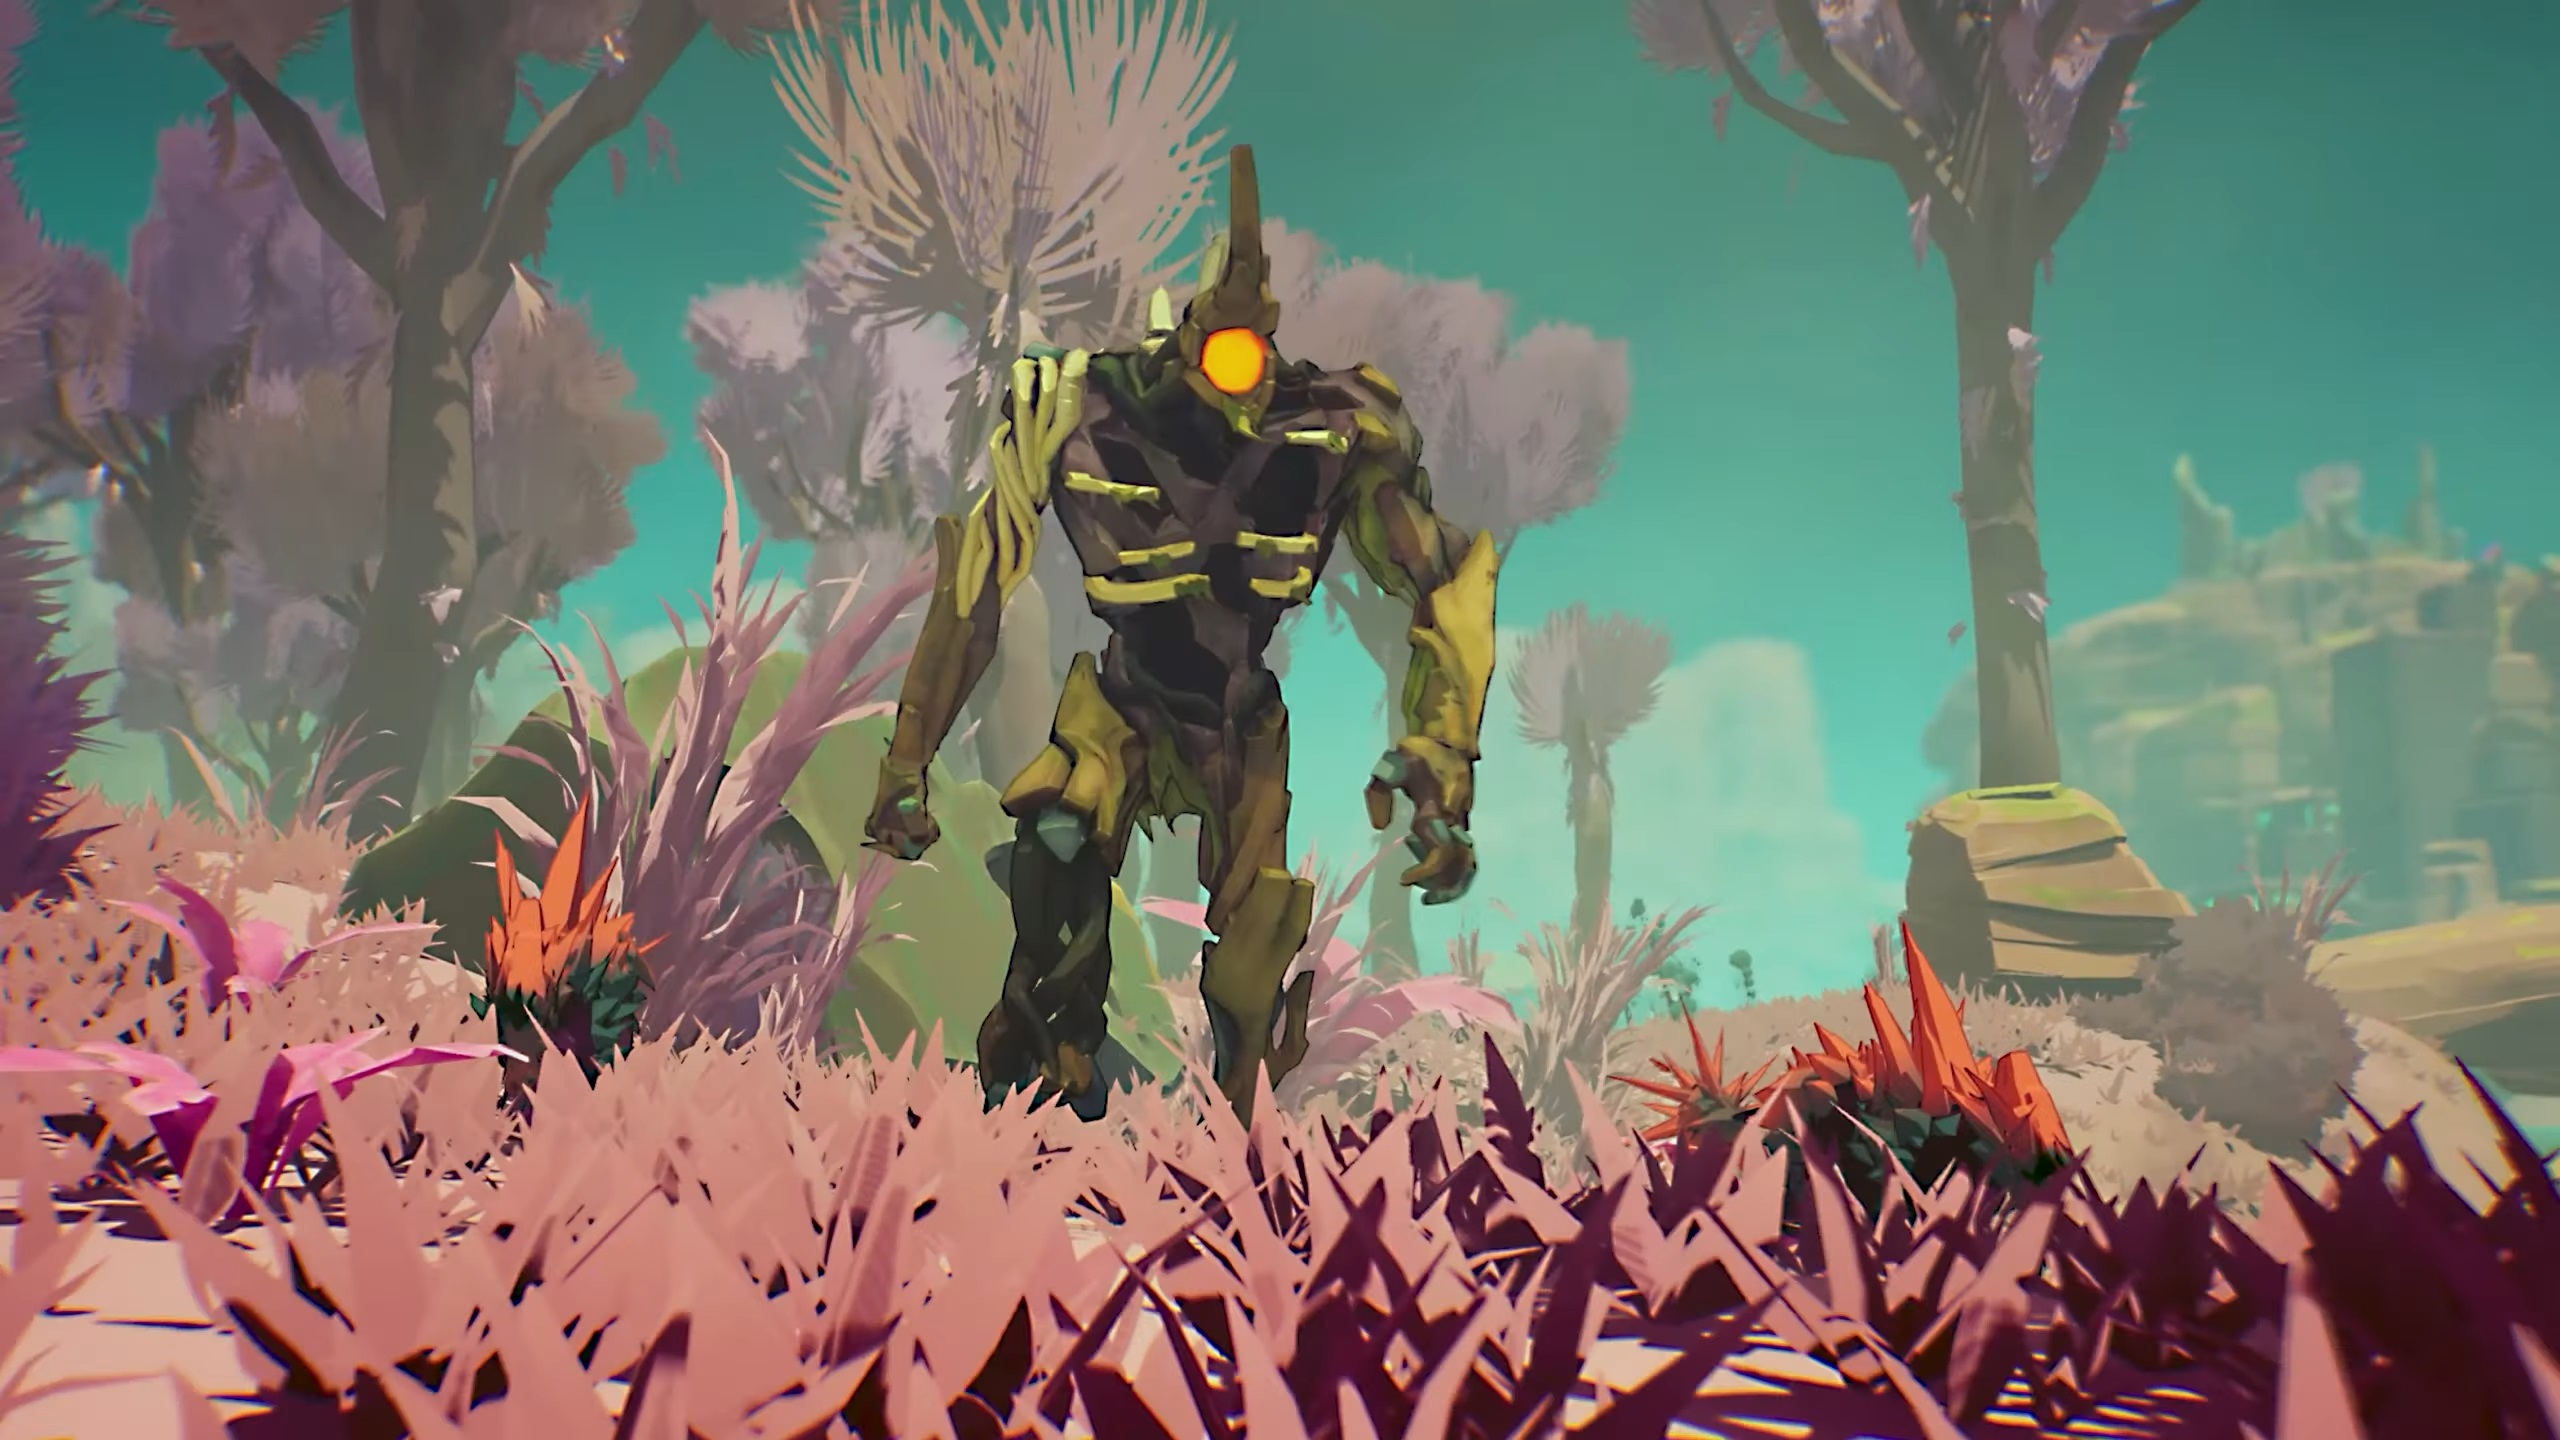
Chris Bullock, shares some in-depth info on our animation process and what’s involved in getting our Leaper to this point:
[previewyoutube][/previewyoutube]
What is Rigging?Rigging is the process by which we take a 3D model and give it the ability to deform over time.
Most often this is done by giving it a virtual skeleton (or armature in sculpture terminology), and then attaching controls that allow the animators to move the skeleton, almost like strings on a marionette. But now there are also other techniques that have been used in Film, TV, and Commercial work for years that are starting to make their way to games. For example: Blendshape deformations are where the 3D model’s deformation is sculpted manually, then blended between the base model and the Blendshape(s).
The Bone Rig / Skeleton Hierarchy Figure 1: Here, we can see the character mesh’s points (vertices) in magenta, edges in dark blue, and then the polygons shaded in gray.
As we can see, here, a character’s mesh is made up of a series of points (a.k.a. vertices) as the fundamental building blocks (magenta dots in above image), along with edges that connect the points, which are then filled-in with polygons. By adding a hierarchy of special objects called “bones” (or “joints” as they are, technically, more accurately called in some software packages) that often roughly resemble an actual skeleton for the character or creature, we’re able to get the model to deform and animate without having to move every single point on the model by hand every frame of an animation. It’s easier to move a few dozen to a few hundred bones on the character than it is to animate tens-of-thousands to millions of points on the mesh.
In order to do this, we need to tell each point on the model which bones it should inherit its movement from, and how much influence each bone has on that vertex. There’s a lot of math that goes into how these transformations are actually carried out, but fortunately, we have tools at our disposal that we don’t need to assign all of this data one point at a time, which actually makes this “skinning” process more of an artistic process than a technical one—defining which parts of the model move together, to give it more of a solid feel, and which parts have a “softer”/”fleshier” feel to them.
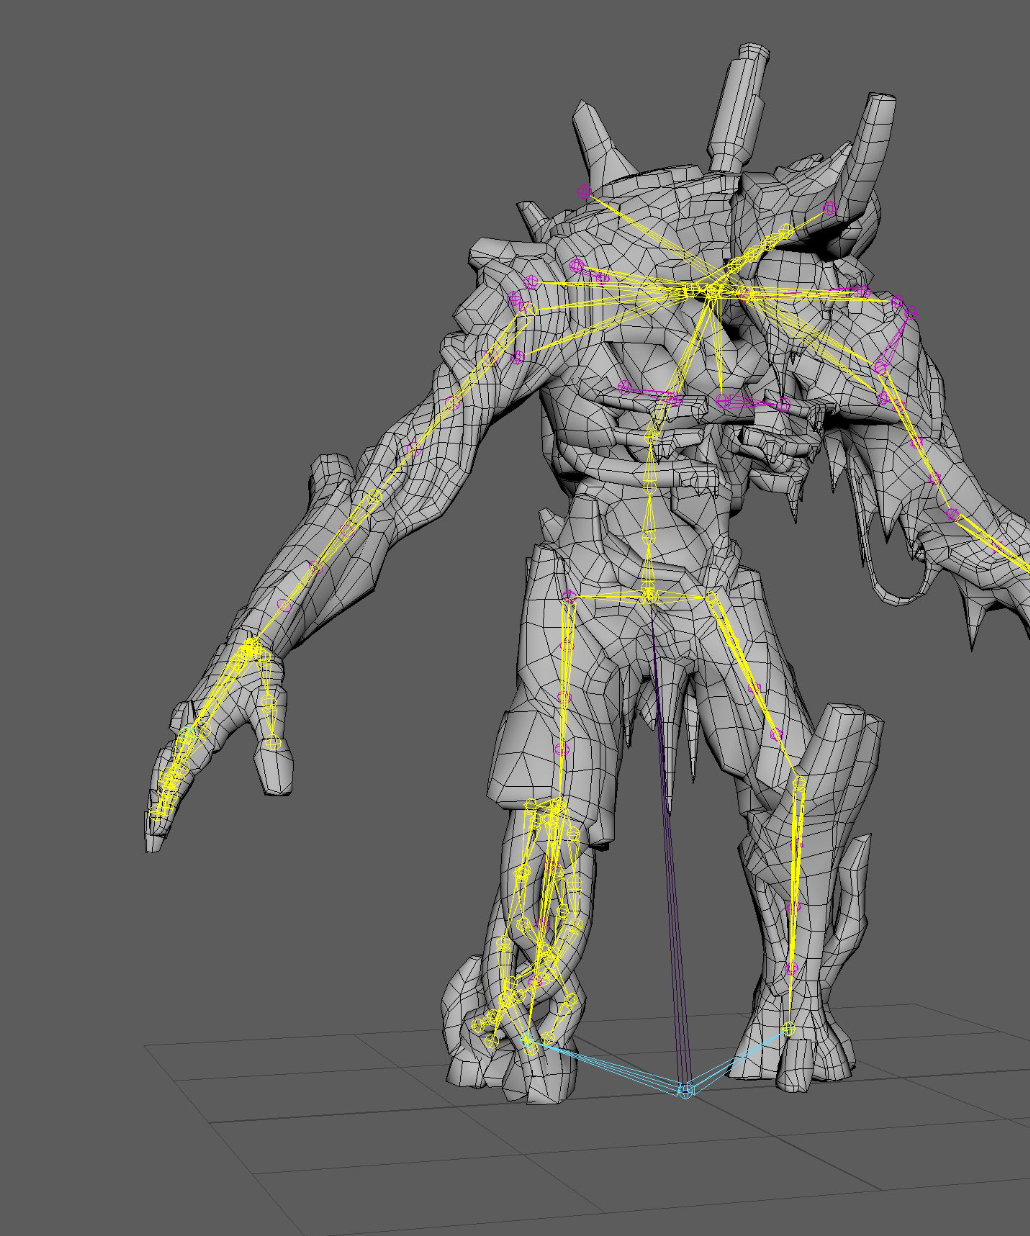 Figure 2: Here we can see our bone objects in yellow and magenta along with our base mesh.The Animation Control Rig
To make things even simpler to animate the bones, rigging will often involve adding Animation Controls, which allows animators to manipulate a series or collection of bones together as a single “system”, or to isolate movement of a bone in a non-hierarchical manner, or in a different manner from the way the bone hierarchy was setup (more on this below). The time saved during animation, when multiplied across a team of animators and total number of animations needed, well offsets the extra time it takes to setup this animation control rig.
Currently, this is most often being done in separate software from the game engine: software such as: Blender, Autodesk Maya, Autodesk Motionbuilder, Autodesk 3D Studio Max, SideFX Houdini, etc. Game engines, such as Unreal Engine 5, are starting to allow the Animation Control Rig to be created directly inside their own editors.
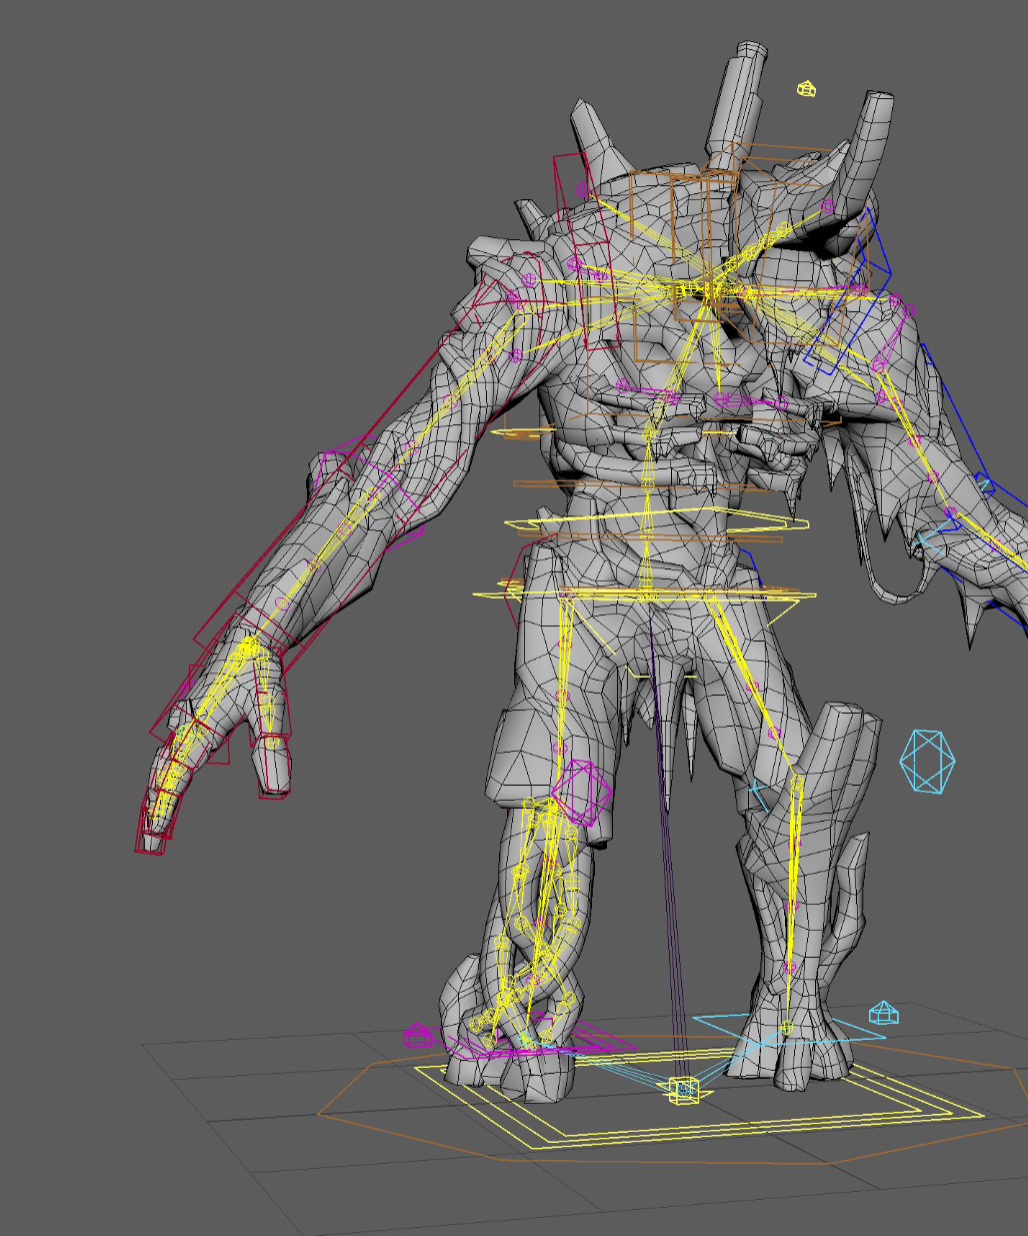 Figure 3: Here, we can see the animation controls (in blue, red, cyan, magenta, orange, and yellow) along with the base mesh and skeleton.
FK – Forward Kinematics – We use this term when talking about a collection of objects being manipulated in a direct parent-child hierarchical manner. Let’s say we have two objects: Object A and Object B. Let’s say that Object A is Object B’s “parent”, and Object B is Object A’s “child”. This means that whenever Object A is moved, Object B will move along with it, keeping the same offset from Object A as it did from the start. However, when Object B is moved, it has no effect on Object A’s position in the scene. We can see this demonstrated in the video below with the Red chain of bones. You can see how as each object in the chain is selected and manipulated, it only affects the objects below in the hierarchy. This is the way that the character’s skeleton would animate if we had no Animation Control rig. So, moving the hips would mean that we would have to move the limbs the opposite amount if we wanted them to stay planted while the hips move. This is called counter-animating, and is something we will often go through great lengths to avoid doing.
IK – Inverse Kinematics – With body parts such as the arms and the legs, we often find it easier to deal directly with the positioning of the ends of the chain of bones, and want any bones that are between the ends to automatically bend in order to achieve the positional goals of the end bones. This is done through a computation technique known as IK. This is demonstrated with the blue chain of bones in the video, below. Notice how we have two control objects that we manipulate directly, and they indirectly control the chain of bones.
[previewyoutube][/previewyoutube]
These are just the two most common of the myriad of ways of controlling the way that something animates. The number of ways that objects can be controlled are near limitless, and new techniques are being discovered/invented all the time.
The Game EngineOnce we have our character modeled, rigged, and animated, we need to get all that data into the game engine, somehow. This is done through an export/import process. Typically, the character mesh and skeleton data is exported separately from the animation data. The character’s mesh data and the skeleton (including the skinning relationship) typically get exported together. In our animation source asset files, any animation data is stored on the Animation Controls. However, the only thing that the game engine cares about is the animation that’s applied to the skeleton hierarchy—it does not care about the Animation Control data at all. So, often what happens is that the animation gets “baked” to the skeleton as a part of the export process—i.e. it just sets a keyframe for every bone in the skeleton hierarchy for every frame in the animation timeline. In the game engine, the animation data is then re-applied to the skeleton, which, in turn gets applied to the mesh, which makes our character move, finally!
We’re also able to setup relationships between bones inside the game engine, which allow us to drive the motion of certain bones based on the movement of other bones. In Figure 2, for instance, the bones in magenta are controlled by the bones in yellow. The reason we do this in the game engine, instead of animating them, and then exporting them, is to allow those bones, specifically, to react to the way the character behaves in-game, rather than adhering to prescriptive movement (a.k.a. “canned animation”)—this helps makes everything feel a lot more alive and reactive.
Wrap UpThis covers some of the basics of the rigging process, and why it’s so important in a modern game production pipeline. Without this process, there is no way we would see the quality of deformation and animation in the games we love.
Let us know…What do you think of the animation / rigging process as a whole? Is it art? Is it math? Does it seem fascinating or boring?